








I built this blog because I wanted one comfortable place to write, review, and publish articles. It runs inside my Django website, so I can manage the words, images, links, and publishing steps without maintaining a separate content system.
This article shows you how it all works. I cover the public blog, my private Admin area, the JSON import feature, images, search, and SEO. I also use every content block available in the editor, which means the page itself is a live showcase of the blog.
What I wanted the blog to solve
I wanted writing to stay simple, but I did not want every article to become one huge text box. Instead, I build an article from smaller pieces such as headings, normal text, code, images, checklists, callouts, social embeds, and FAQs.
This makes editing much easier. I can move an image, replace a code example, or remove a callout without disturbing the rest of the article. It also helps every article keep the same clean style.
I can be flexible with the content while the blog takes care of how each part looks and behaves.
A public reading experience built for real articles
When you open the blog, you can browse all articles or narrow them down by category, tag, author, or year. I also added search and filters for times when the archive gets longer. These basic controls still work if JavaScript is unavailable; JavaScript only makes them feel quicker.
Inside an article, you get breadcrumbs, a table of contents, reading time, related posts, and previous or next links when they are available. You can also switch reading mode, copy or share the link, print a clean version, and open larger images in a lightbox. The lightbox works with a keyboard too.
Here is a simple overview of the main pages.
| Page | What you can do there |
|---|---|
| Blog archive | Browse, search, filter, and discover articles |
| Article page | Read an article and use its navigation and media tools |
| Category, tag, and author pages | Find more writing about one topic or by one person |
| RSS feed | Follow new articles in a feed reader |
Light and dark presentation without duplicate content
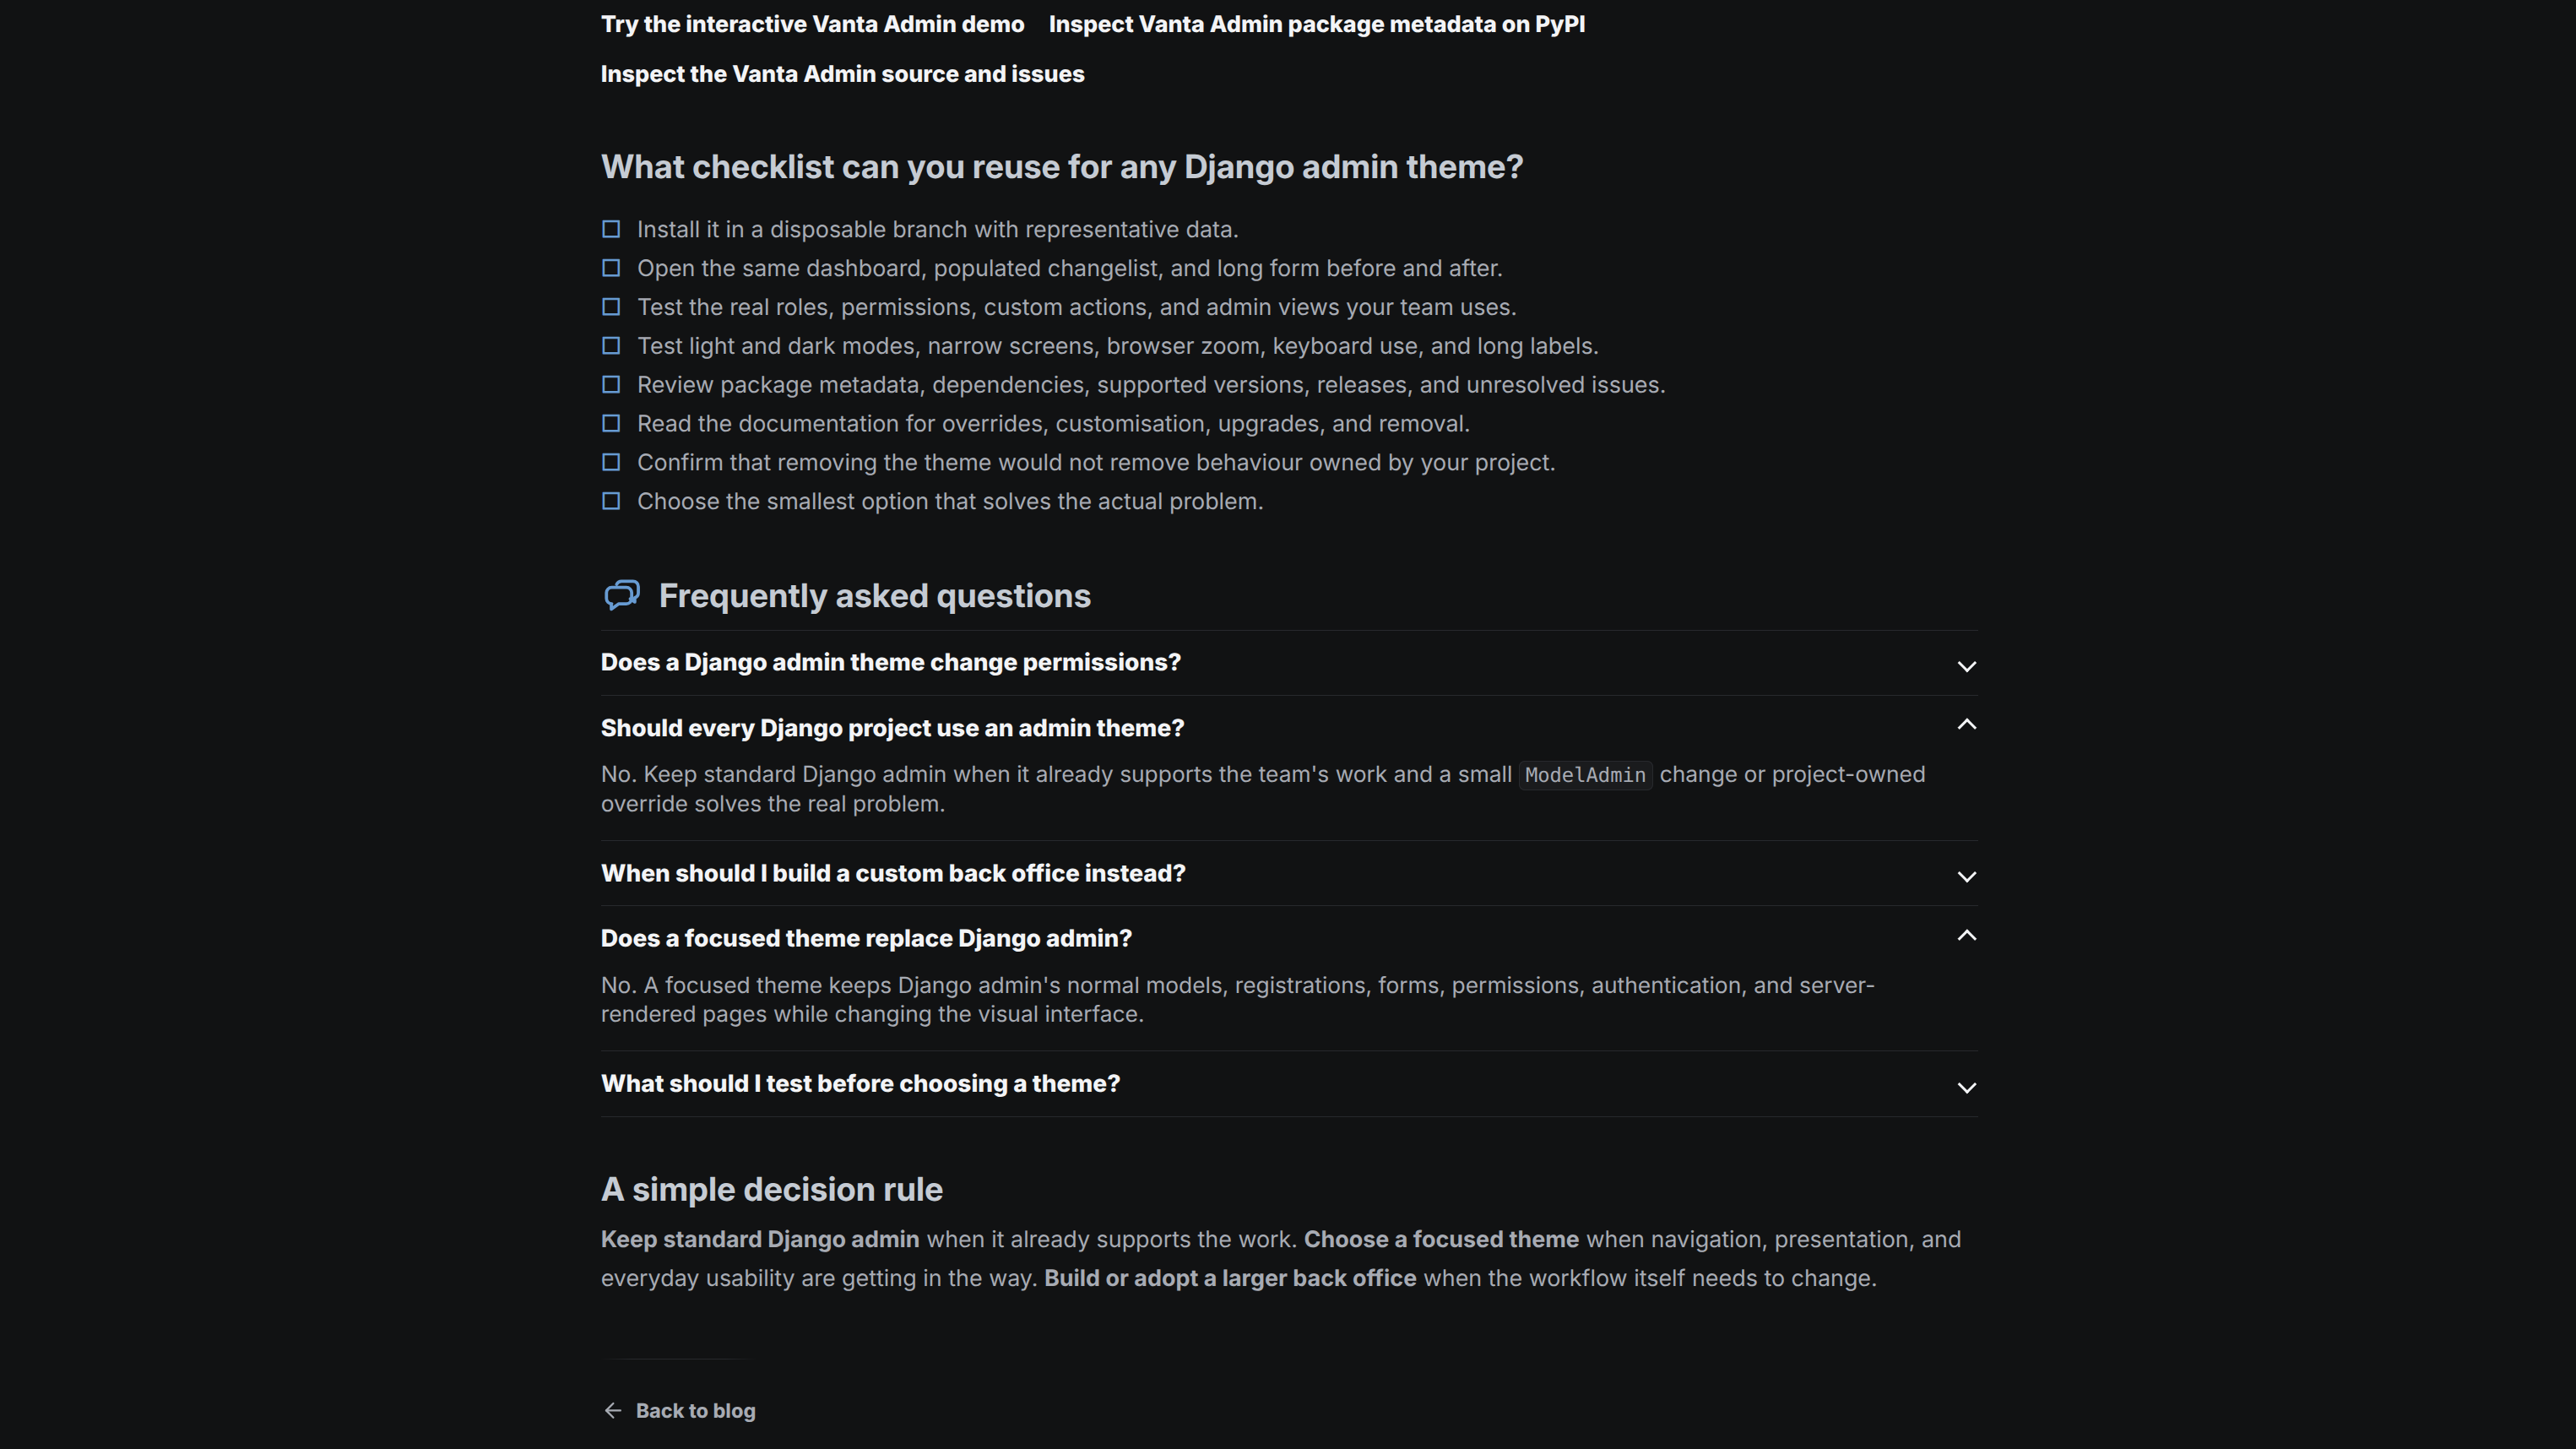
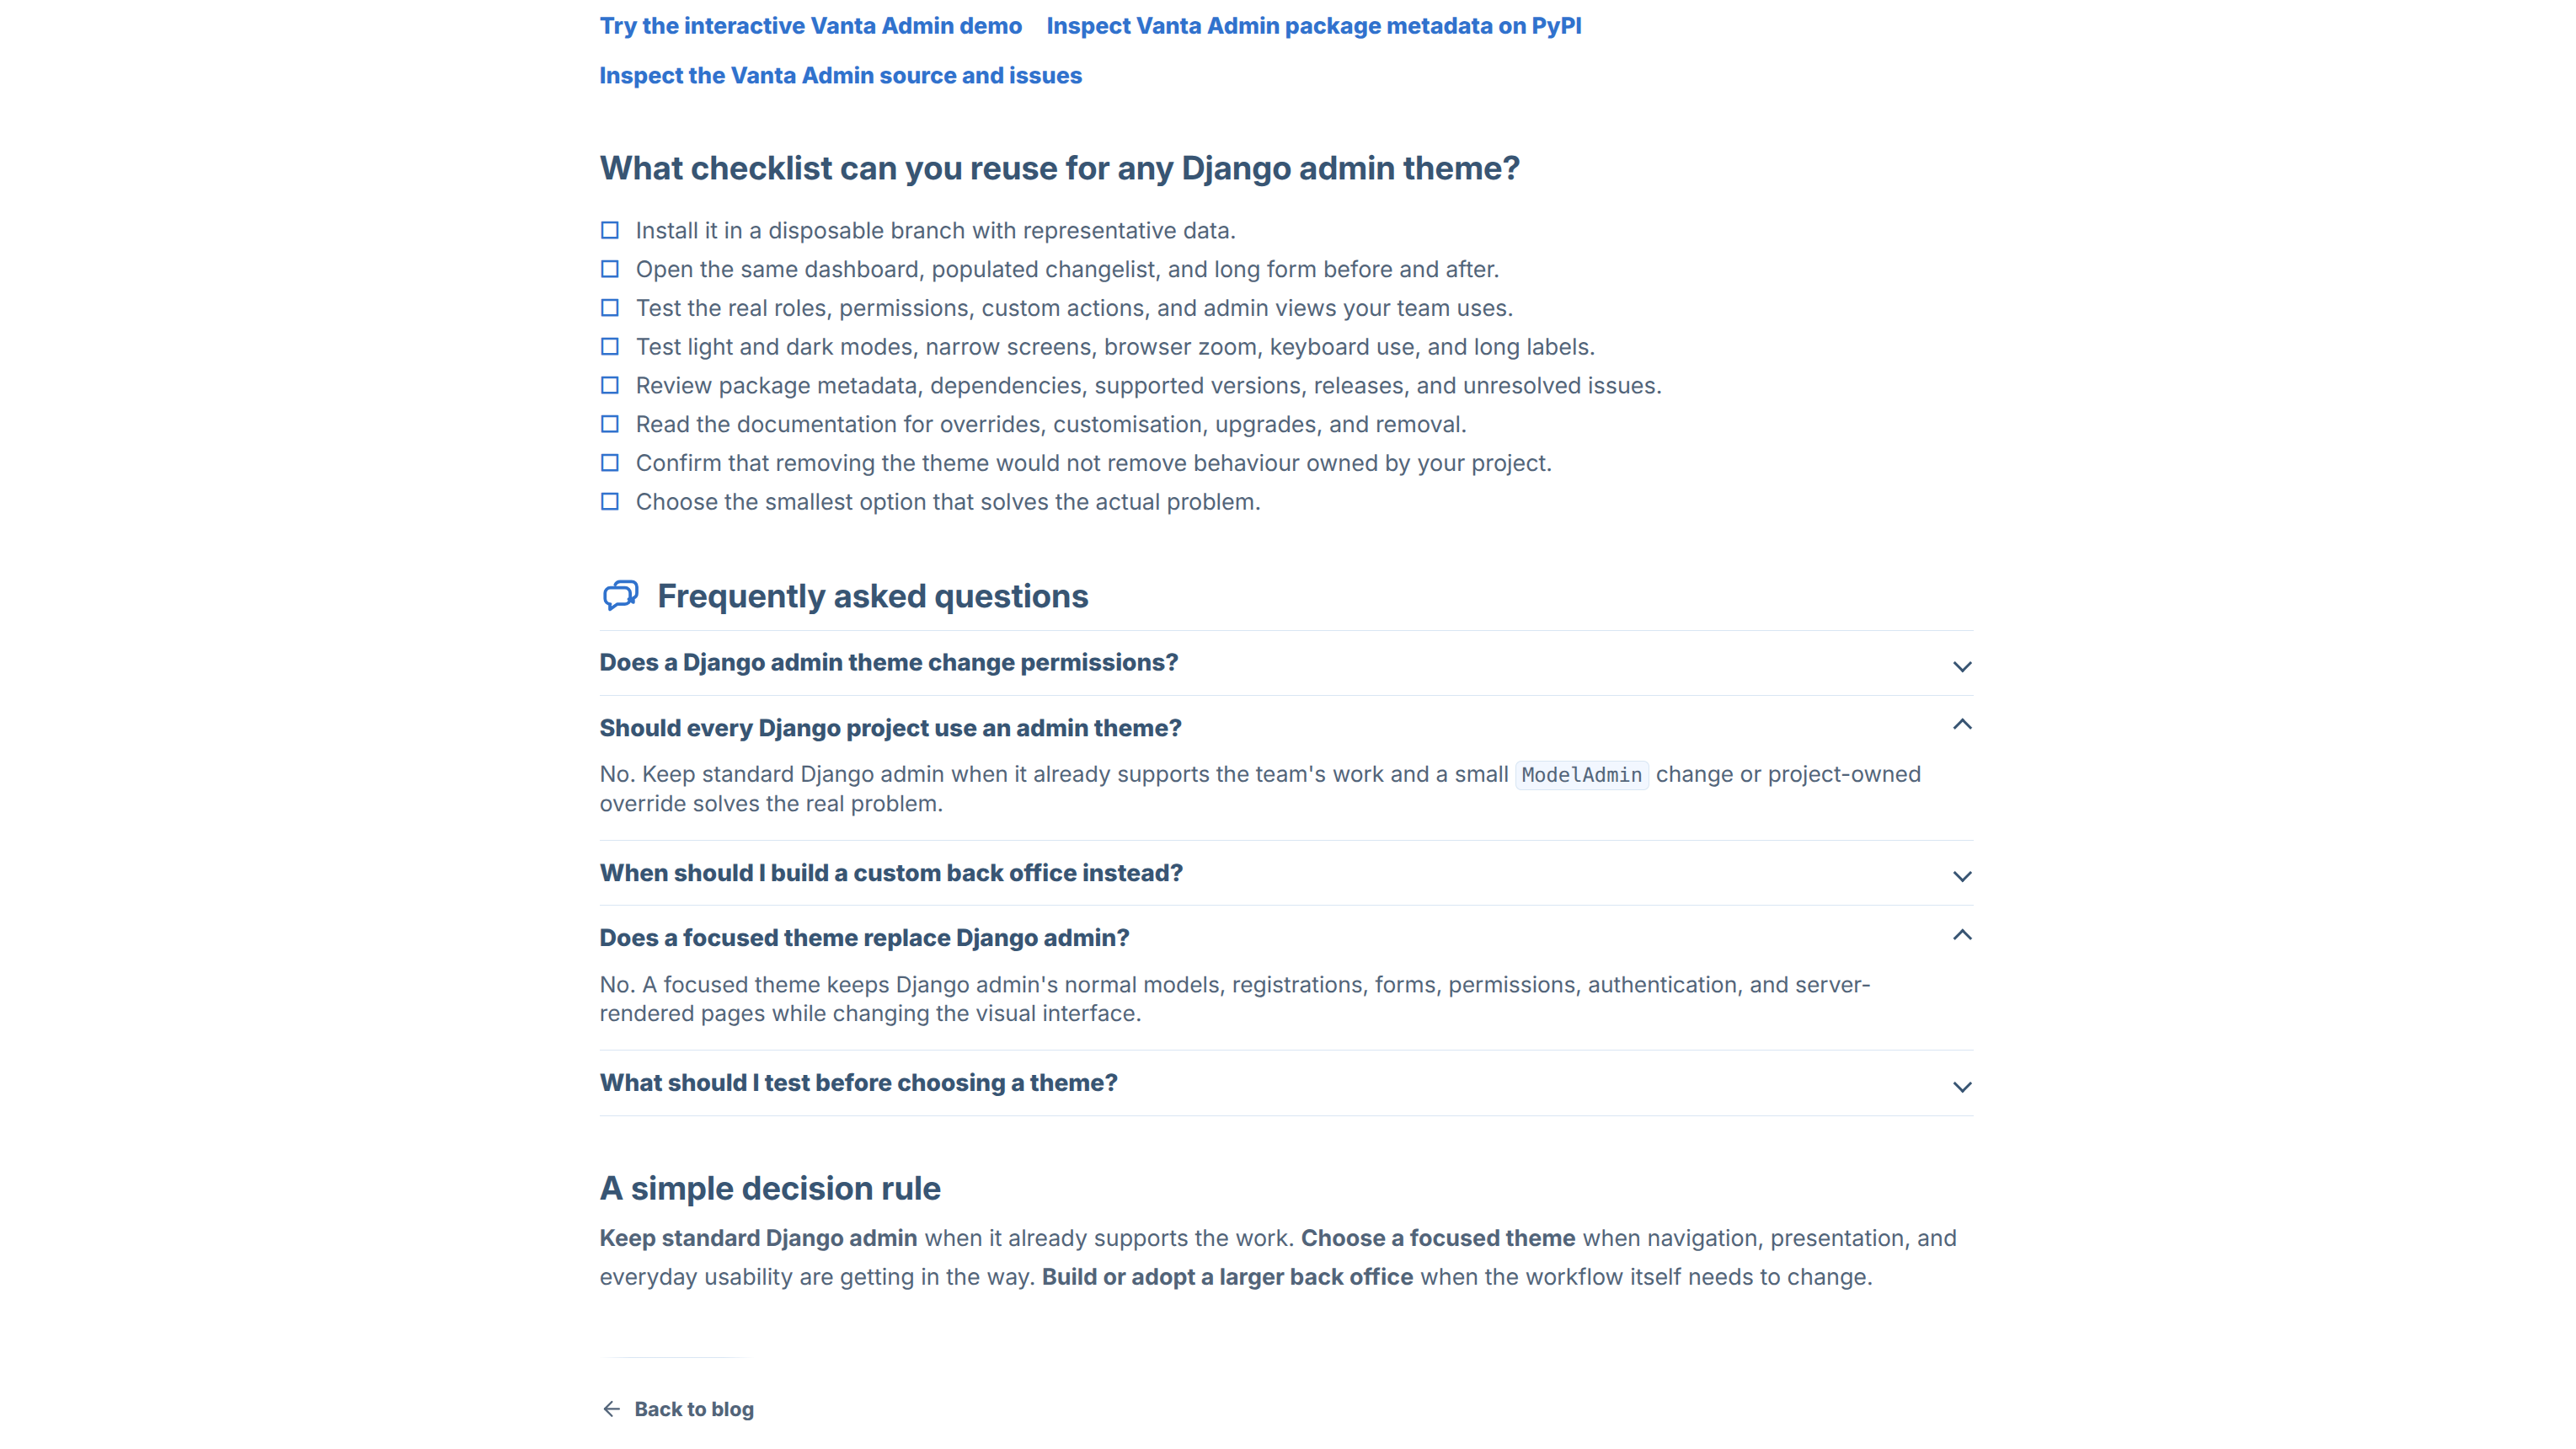
I designed the blog for both the light and dark themes of my personal site. The words and layout stay the same, while tables, code, callouts, embeds, captions, and controls adjust to the chosen theme. You can compare the same section in both themes below.
Structured content blocks, not arbitrary page markup
I chose a clear set of content blocks instead of letting articles contain any custom code. That gives me enough freedom for detailed writing without making the pages hard to maintain.
- Headings and rich text hold the main story, lists, links, quotes, and tables.
- Code, checklists, callouts, and FAQs break up instructions and important details.
- Images and comparisons let me show a real screen or compare two matching views.
- Source, link group, and internal link blocks give readers clear places to continue.
- Social embeds can show one public YouTube video, X post, or Reddit post.
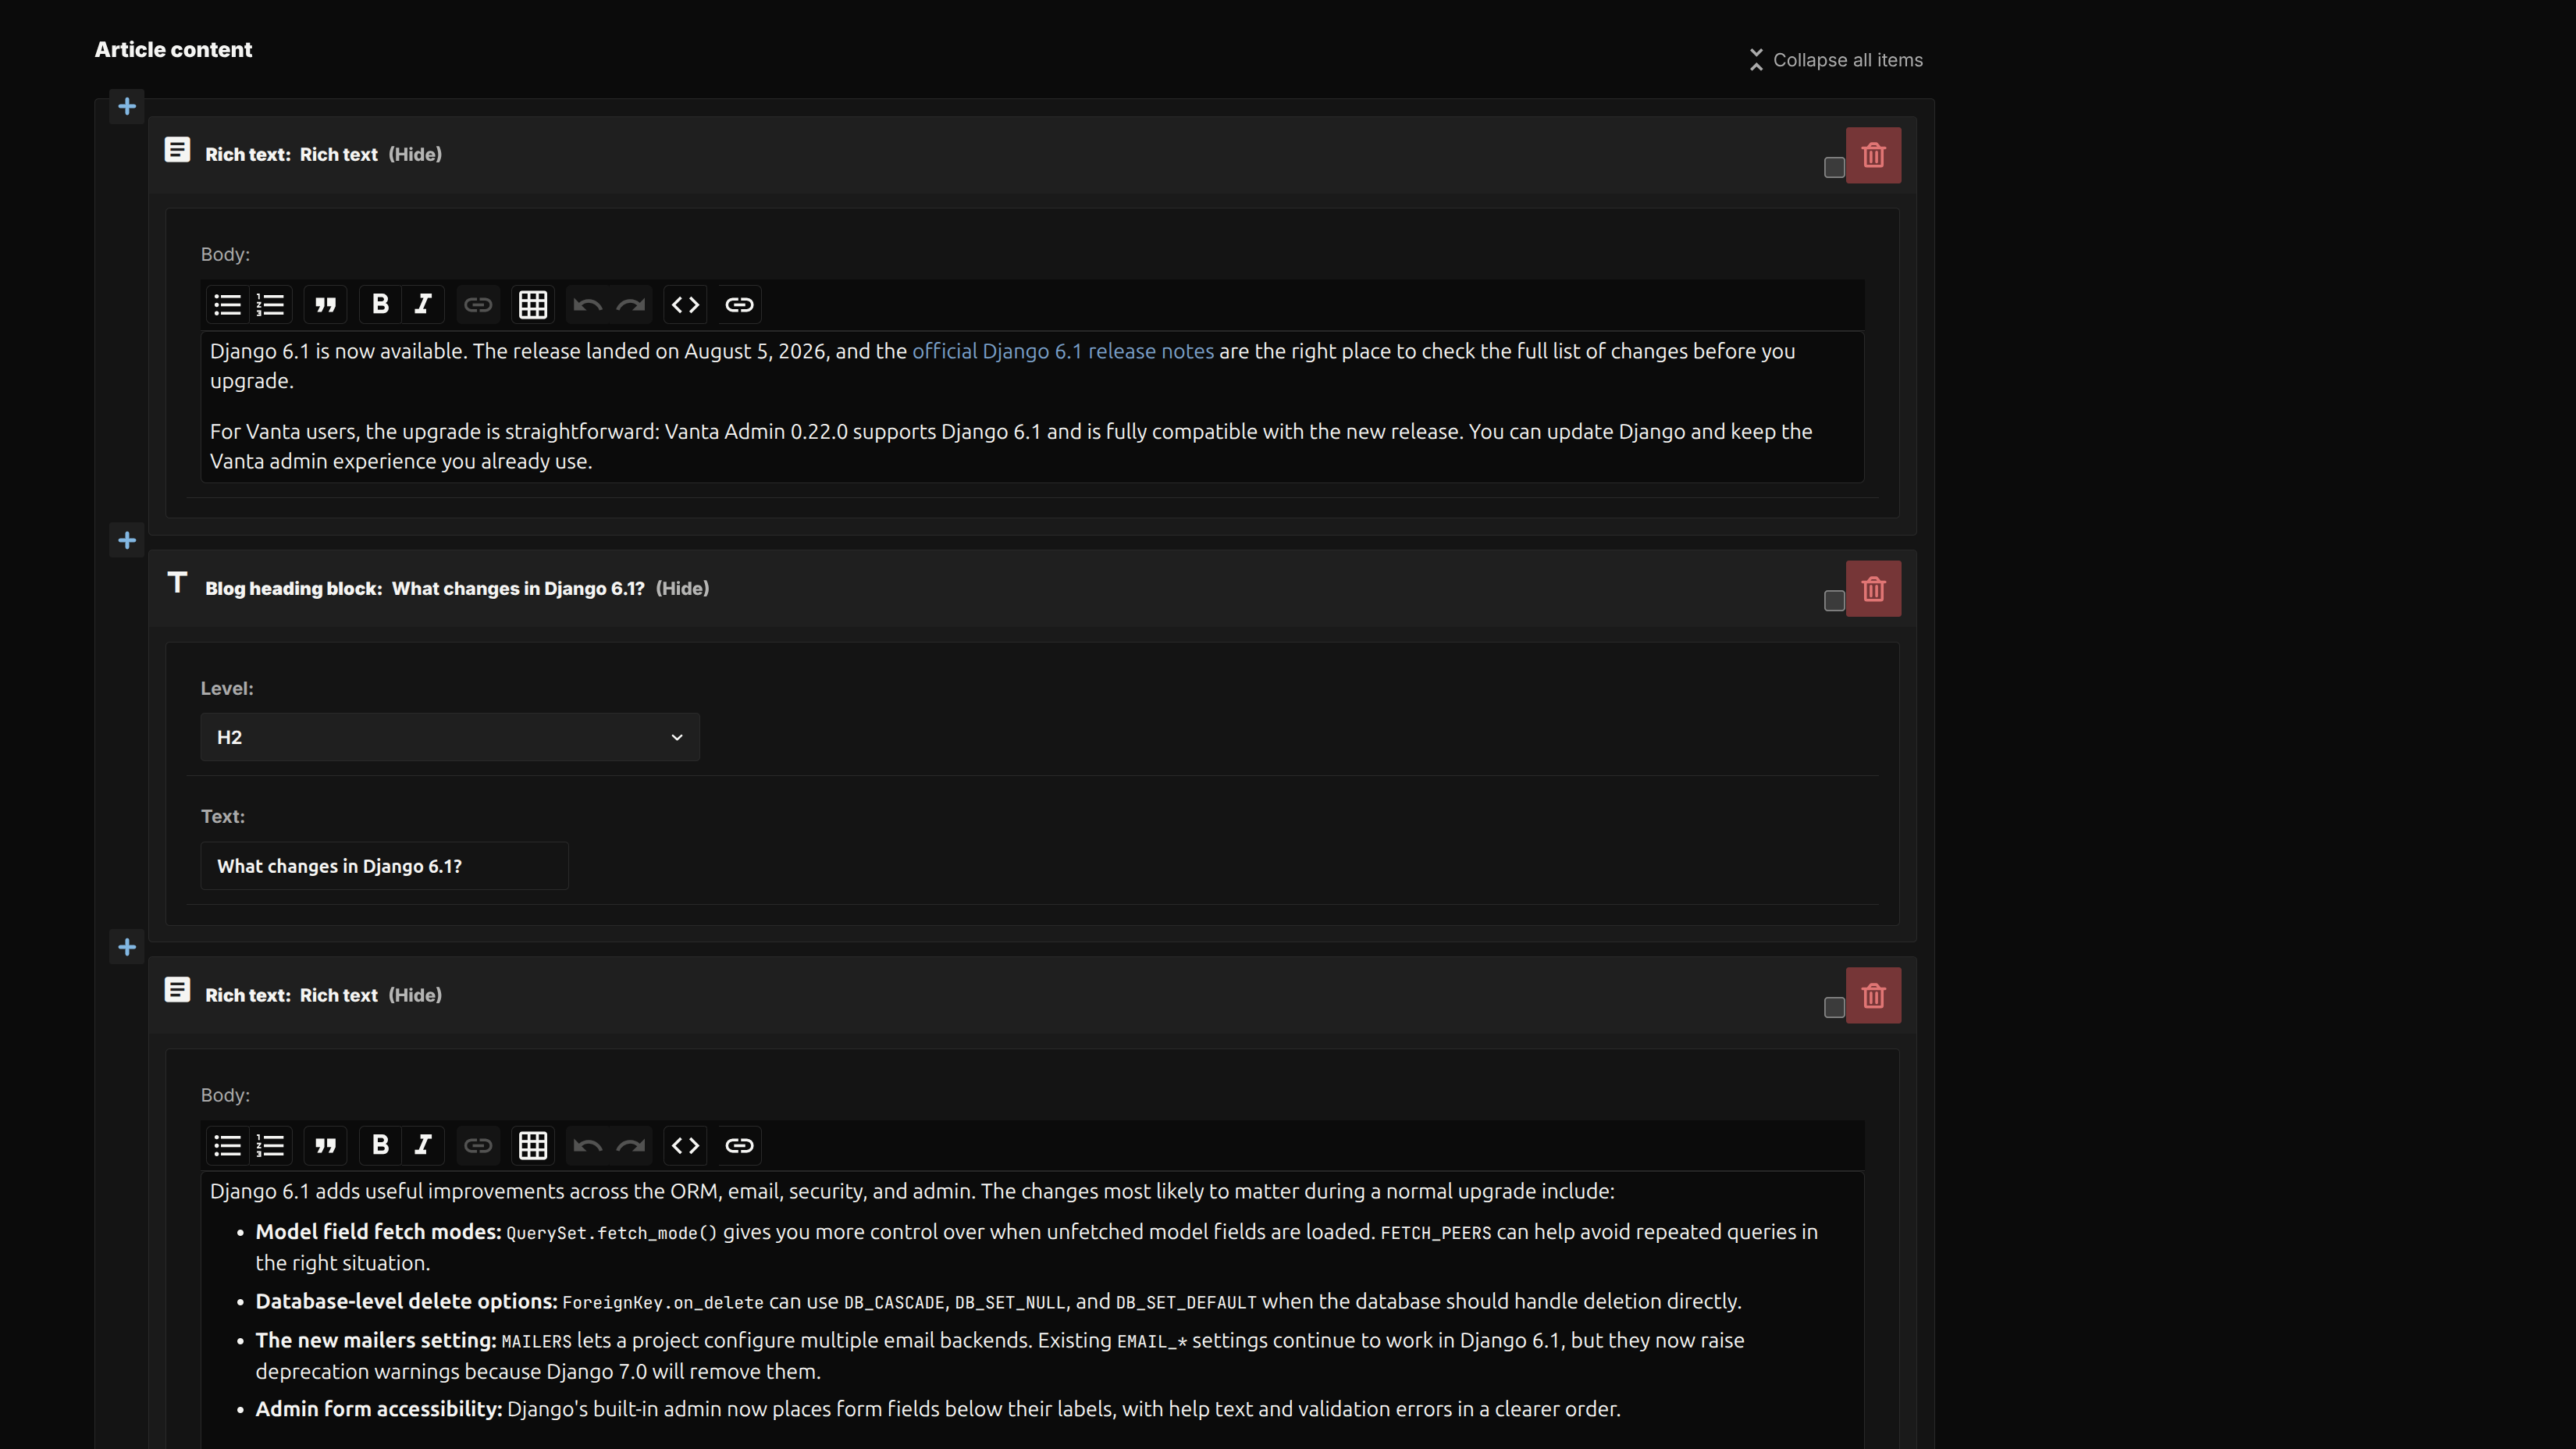
I arrange these blocks in the order I want inside Django Admin. The blog then checks each block and displays it in the right style.
- Write the article as small, meaningful content blocks
- Add descriptive image text and captions where they help
- Preview the saved draft in the correct website design
- Resolve publication checks before making the article public
The Django Admin is the editorial workspace
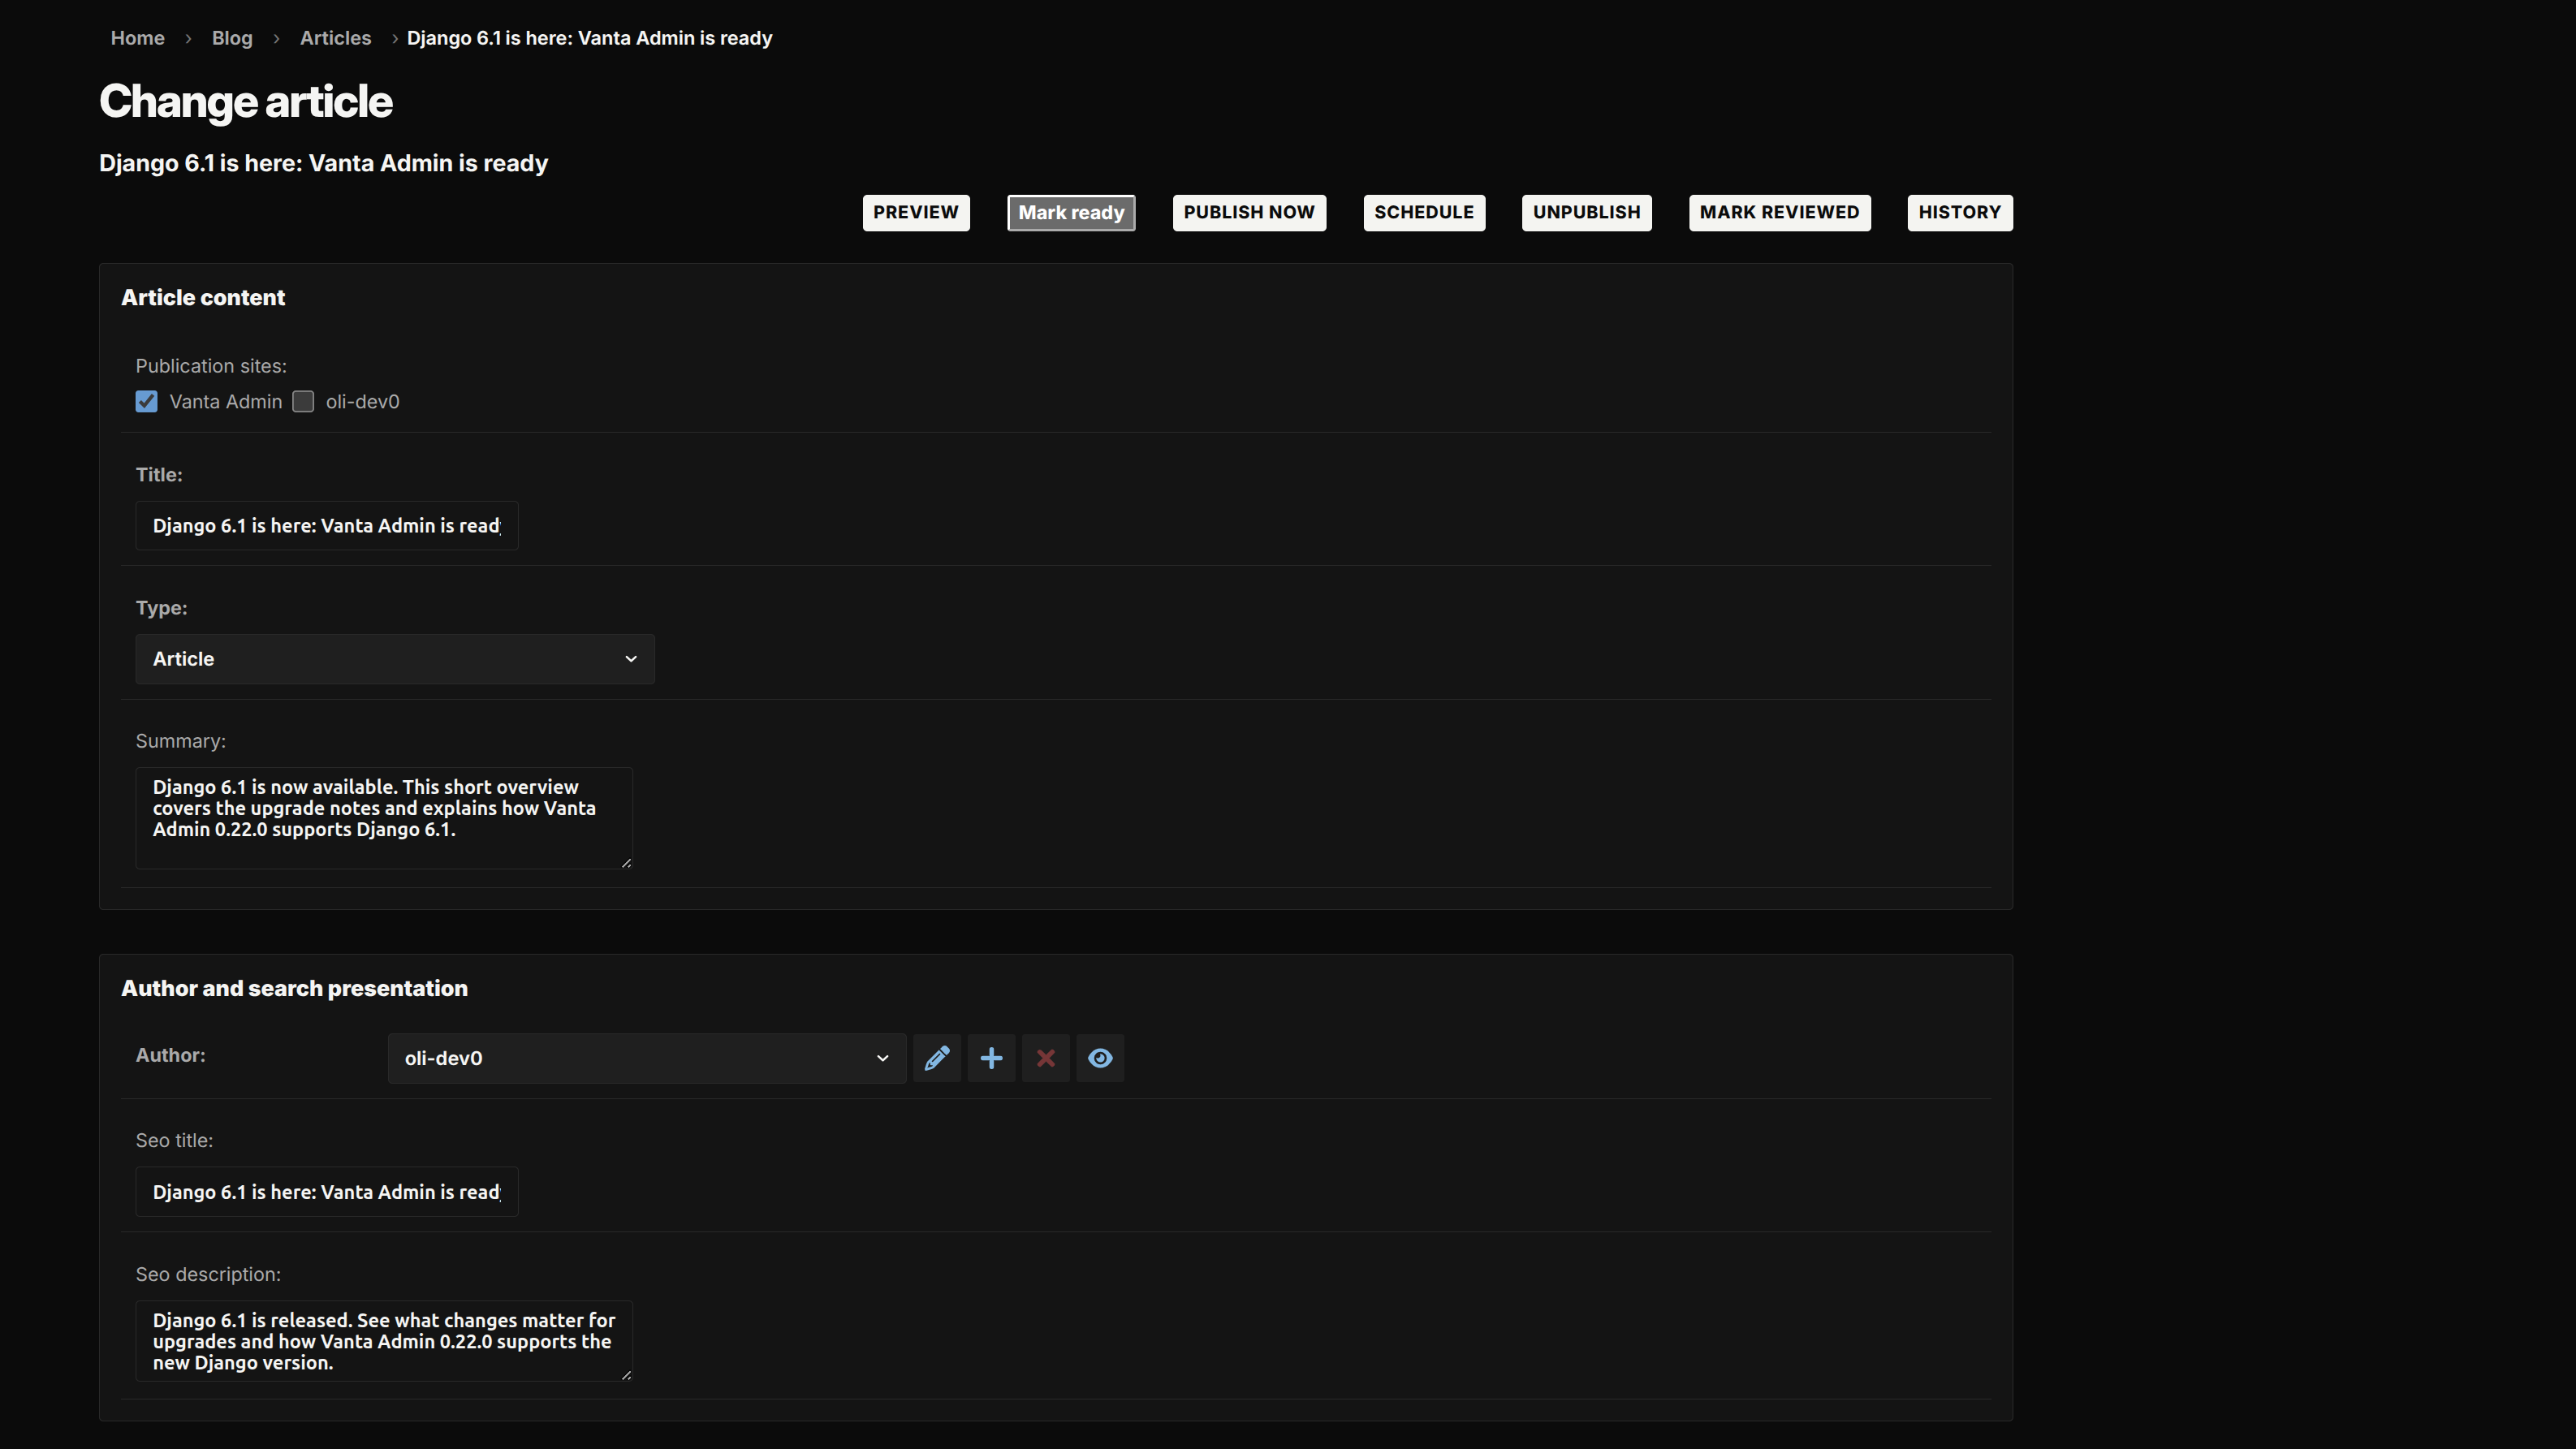
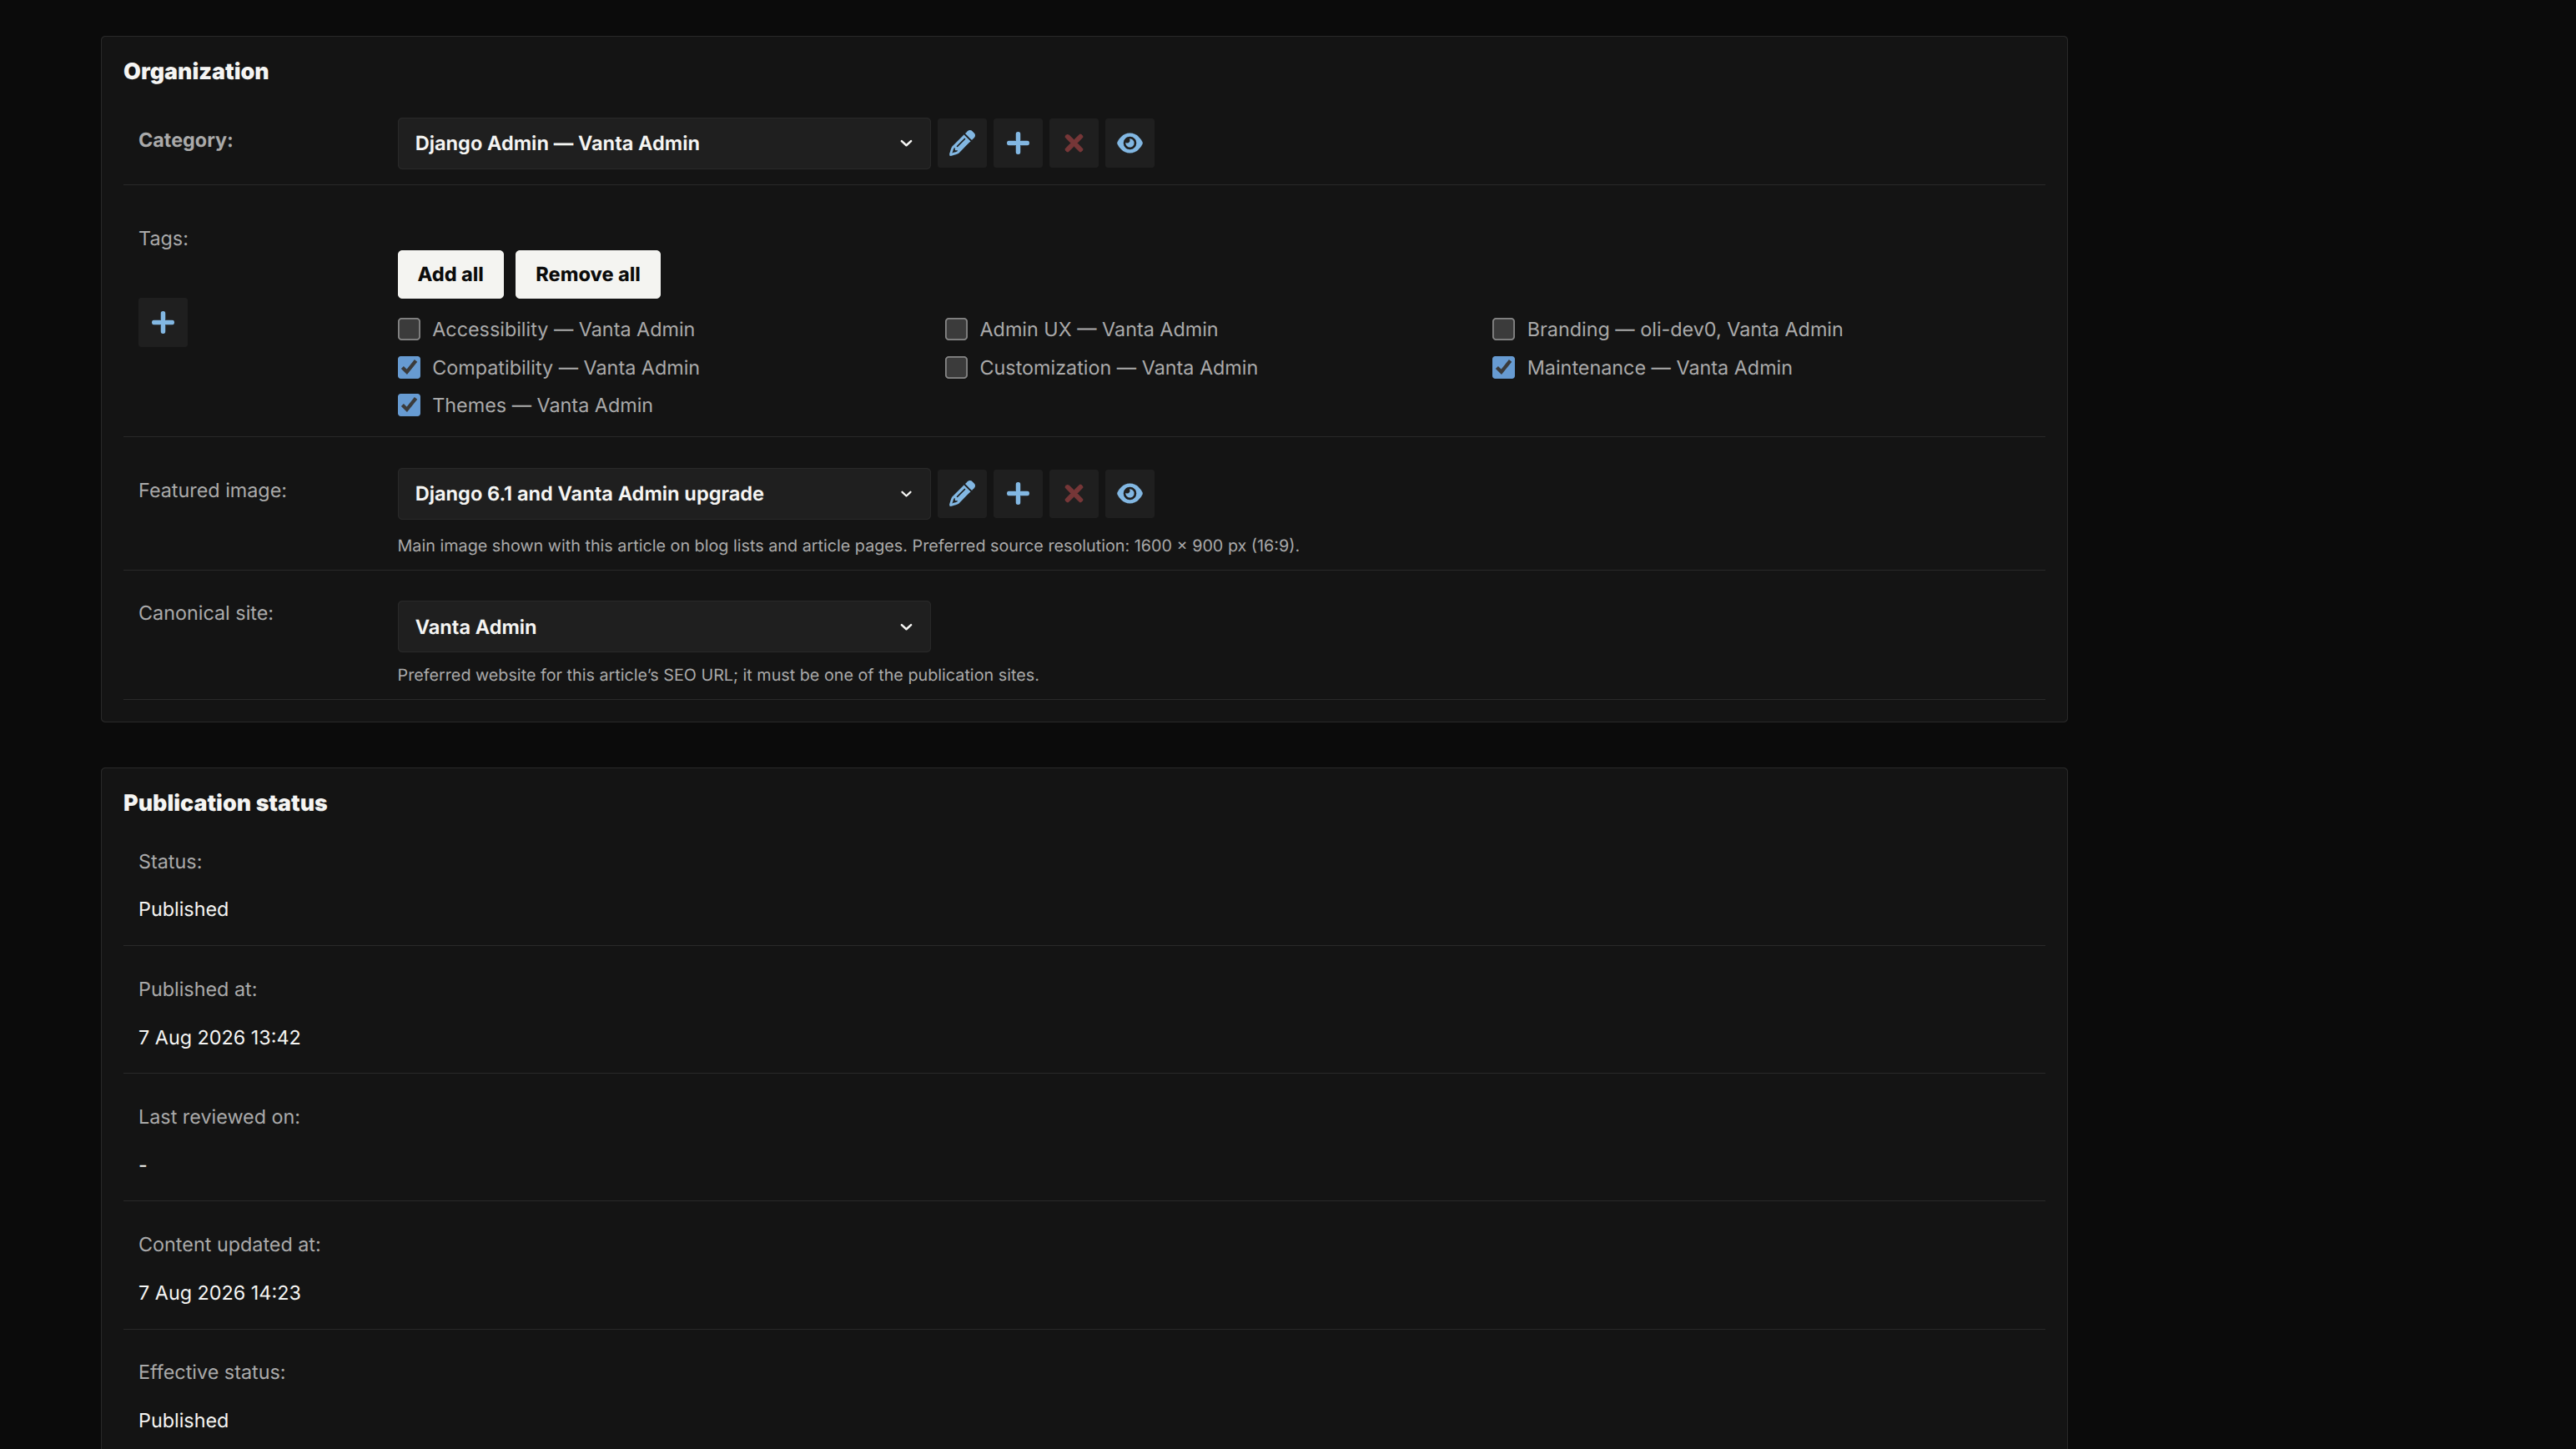
I manage the blog from a private area built with Django Admin. To start an article, I fill in a short form with the title, website, article type, category, and author. I can then add and reorder content blocks, choose images, connect related articles, and preview the saved draft in the real website design.
I also manage authors, categories, tags, reusable images, and image comparisons from the Admin. When an article is ready, I can send it for review, publish it now, schedule it for later, or take it offline again. Django permissions decide who is allowed to use each action.
I keep this area private because it is my publishing workspace, not a page for regular visitors.
Django reference: Django's official guide to the model-centred Admin and its intended use as an internal management tool.
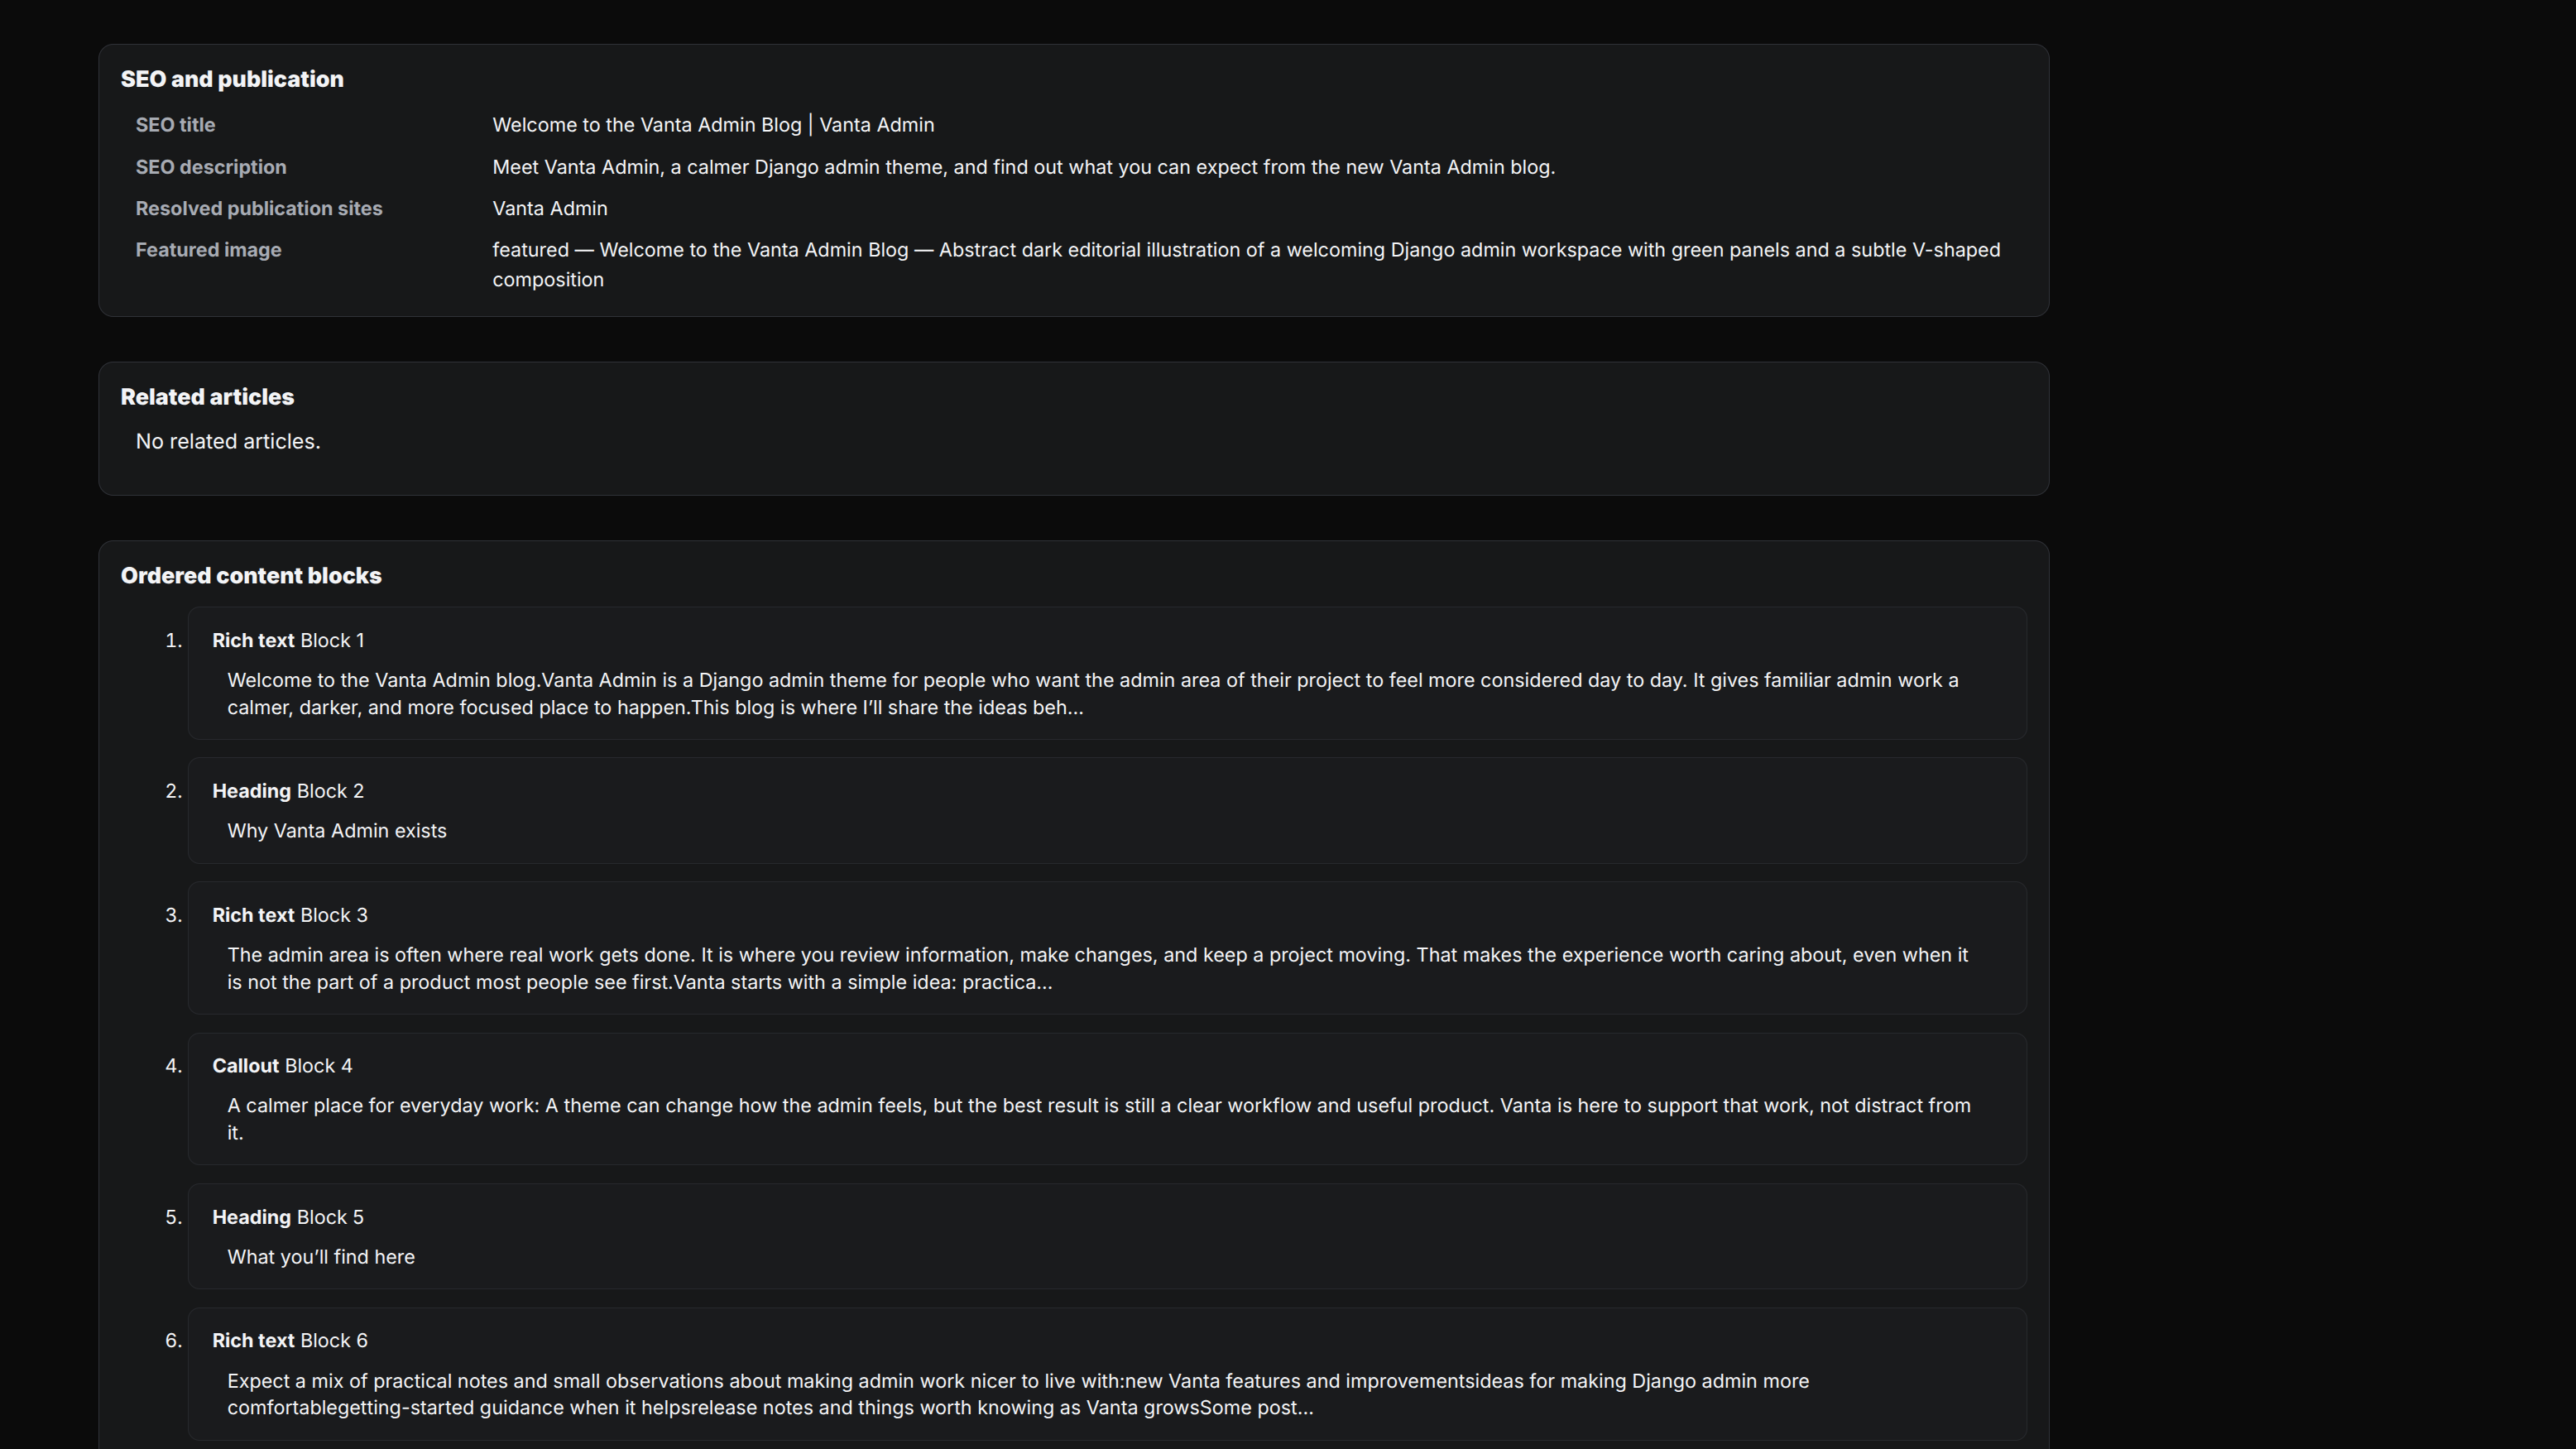
A private JSON import turns prepared articles into drafts
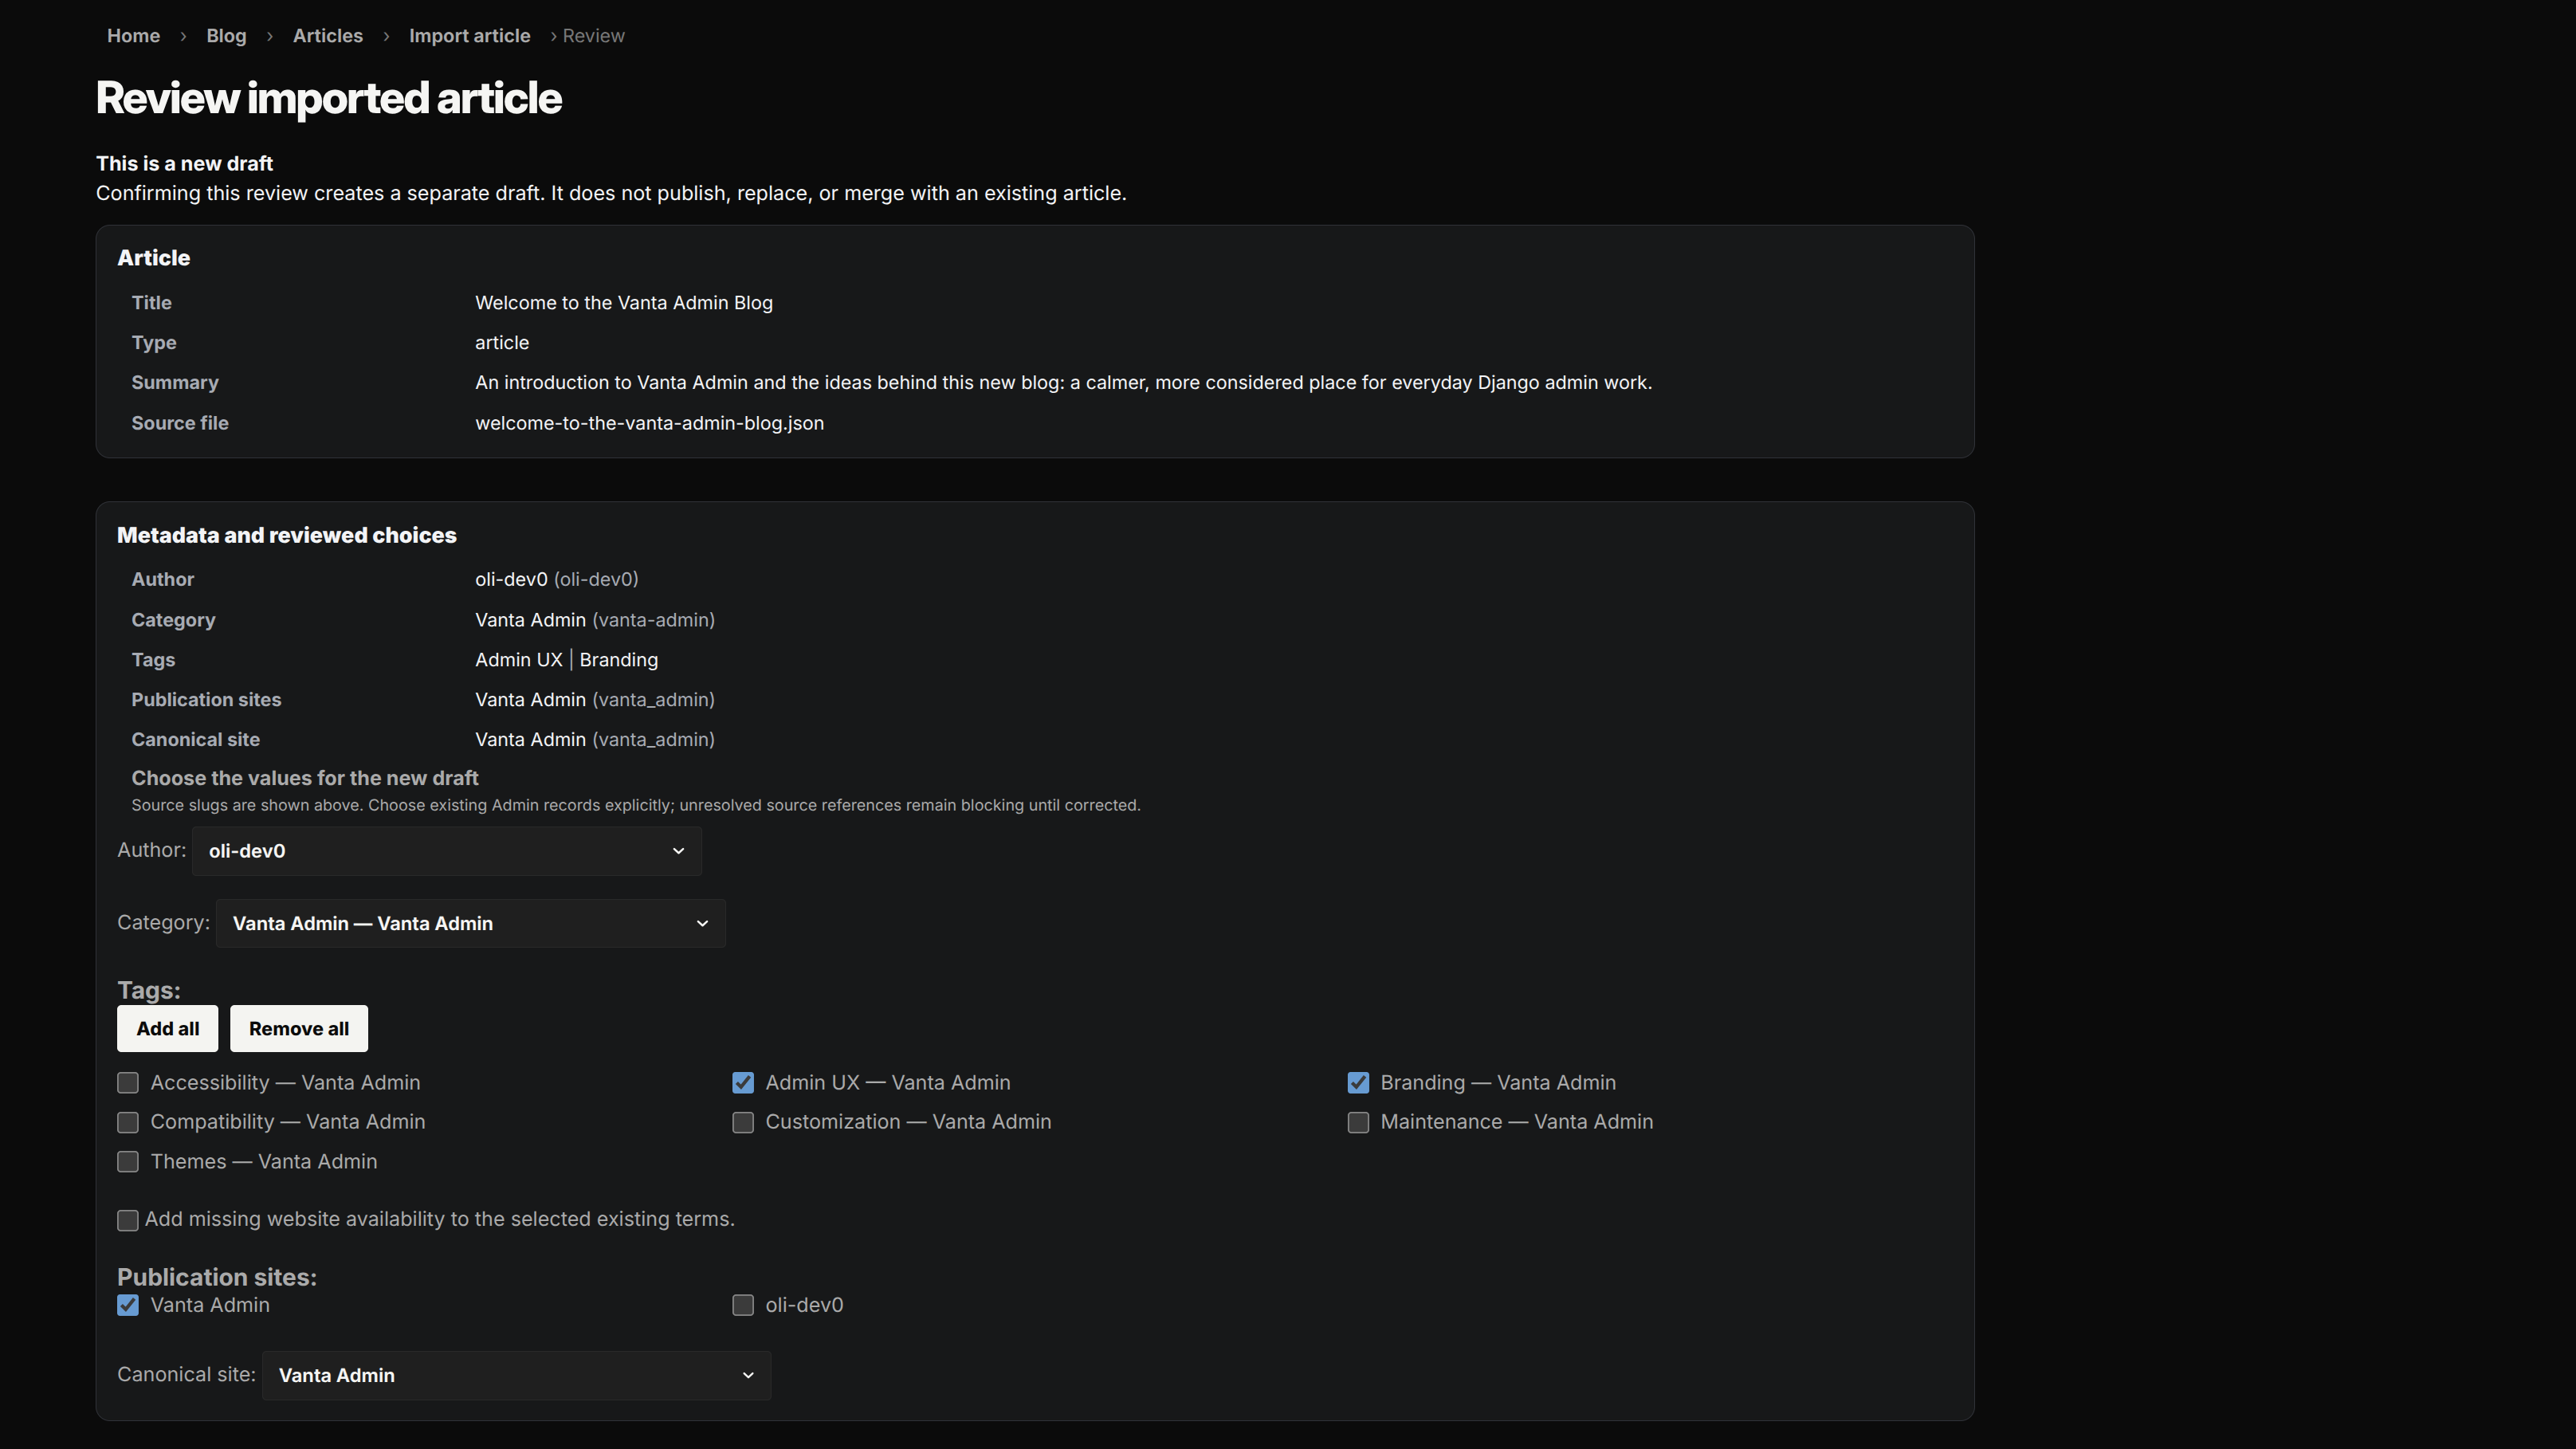
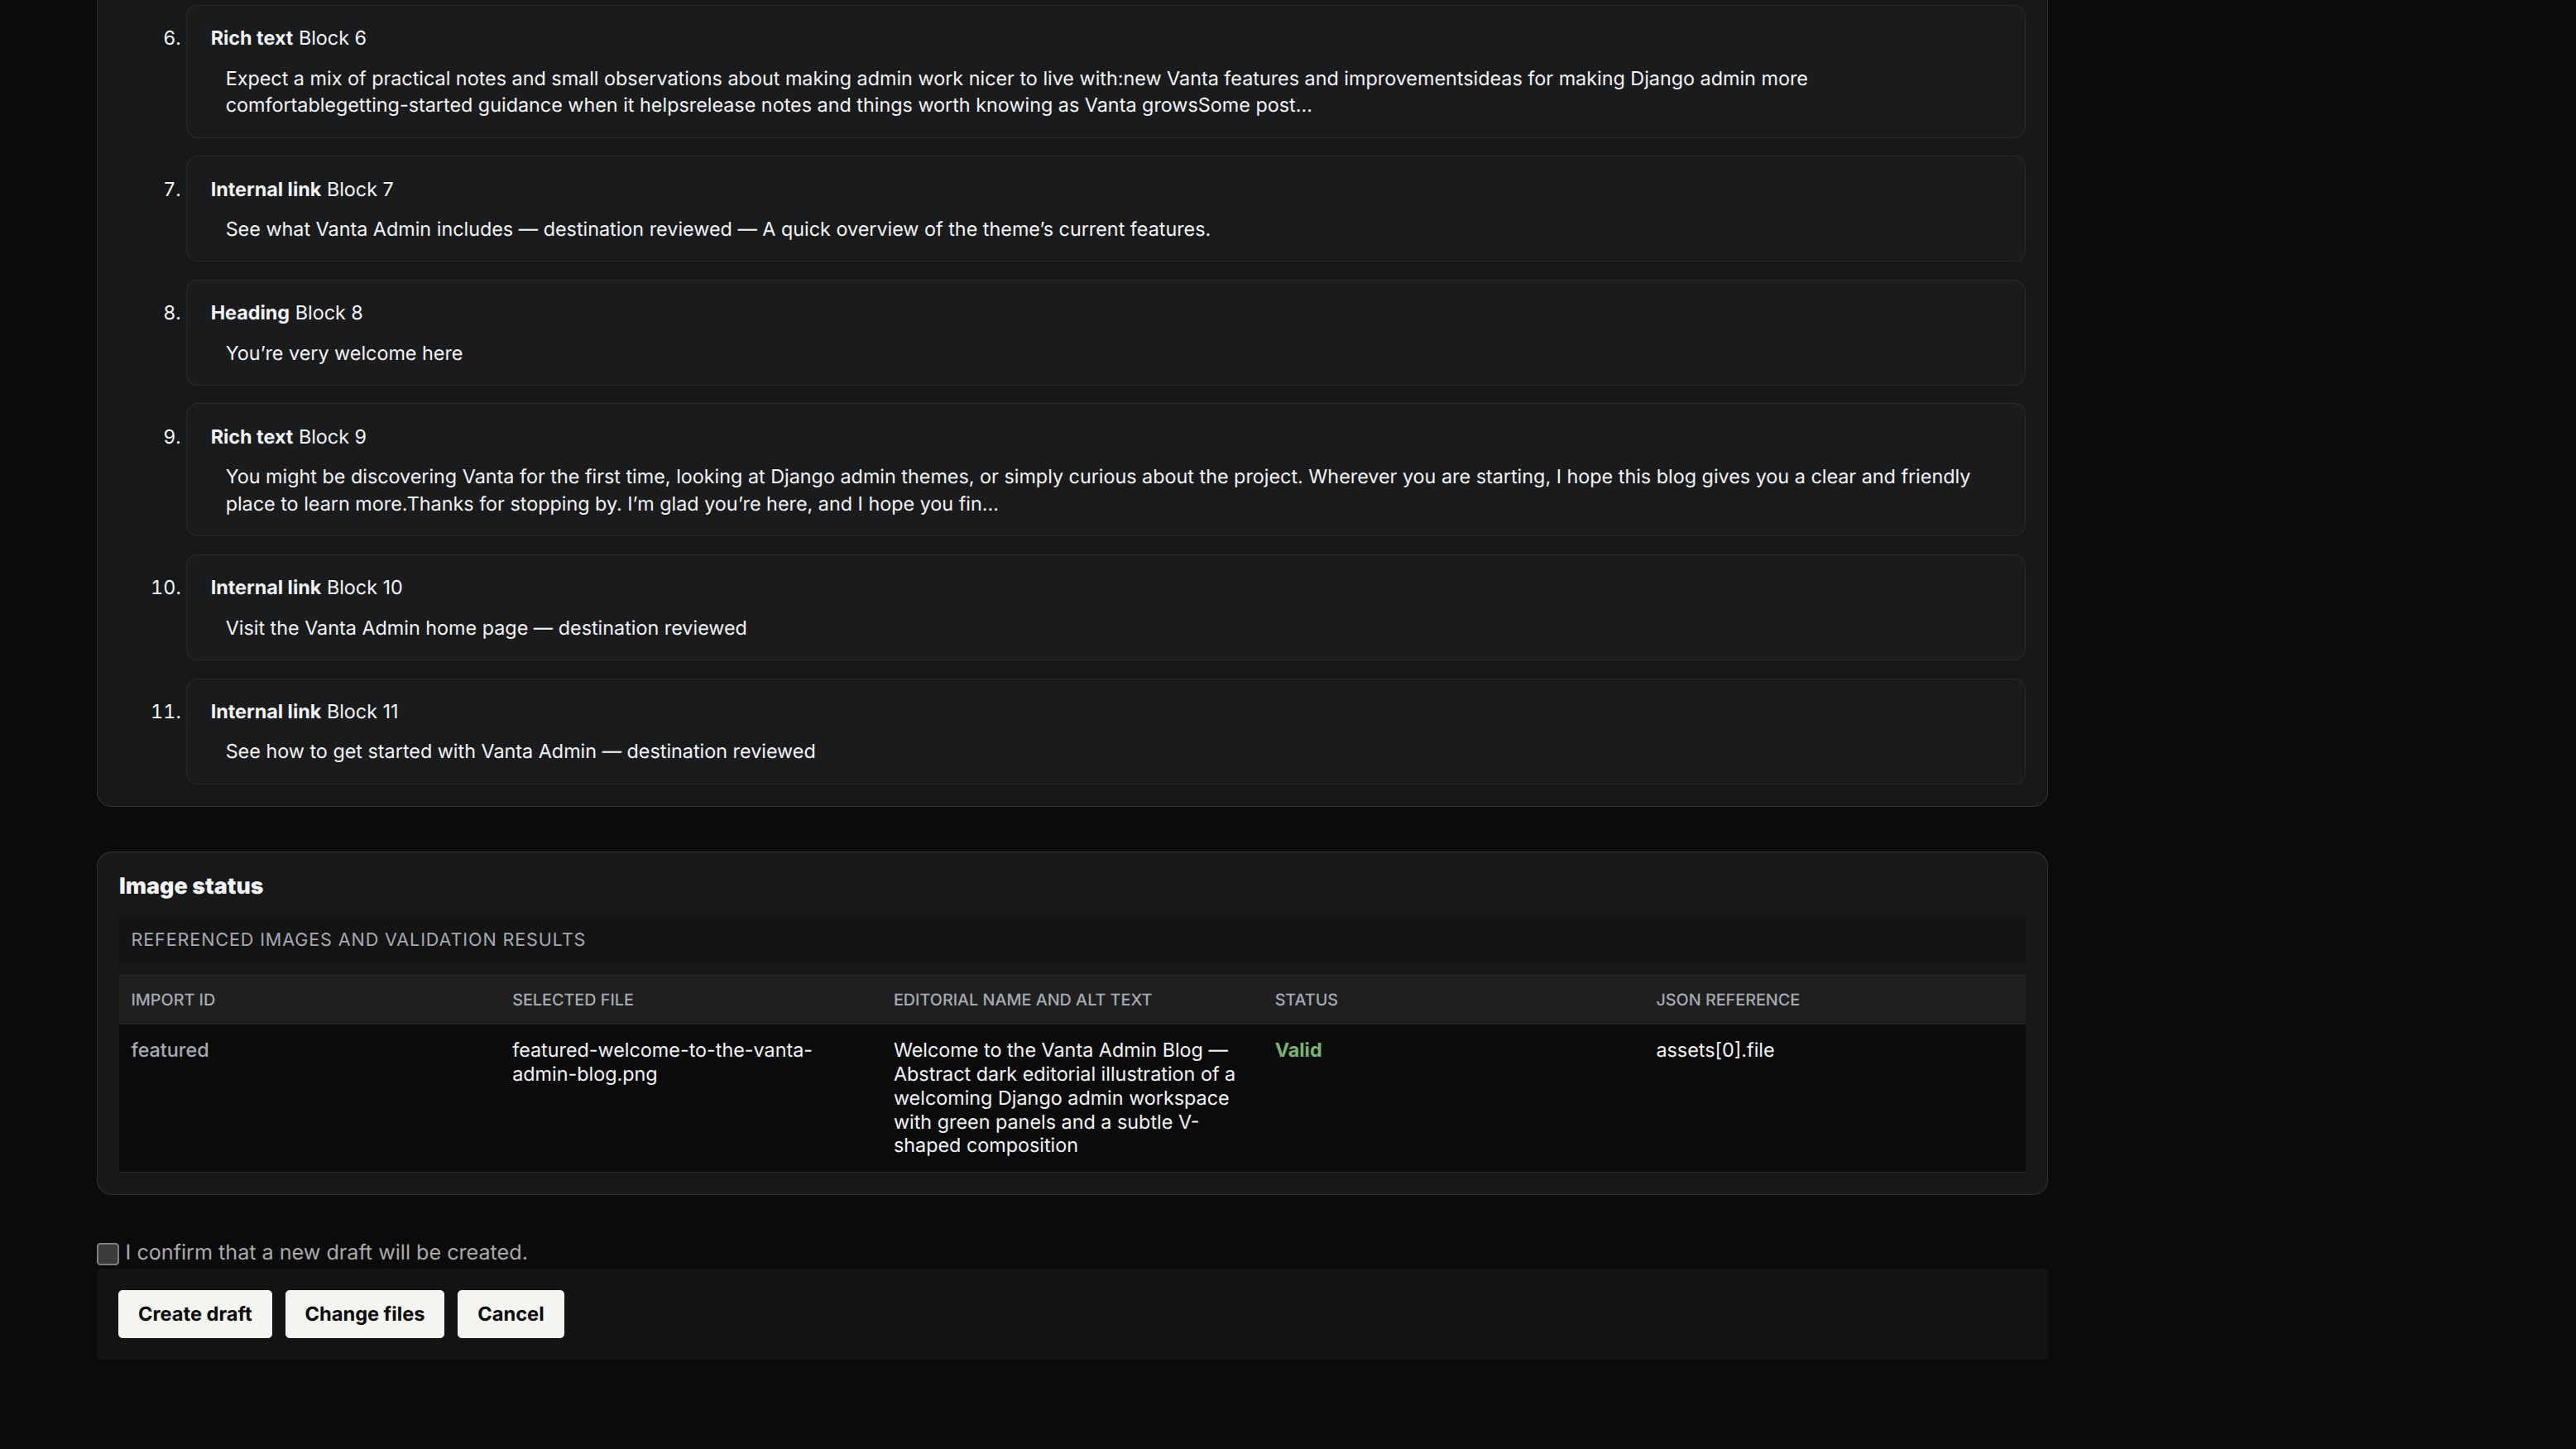
For a longer article, I often prefer preparing everything outside the browser. I can then import one JSON file together with its images. The blog checks the complete package and shows me a private review page before it creates anything.
On that review page, I can check the author, category, tags, website, content blocks, links, and images. If a category or tag does not exist yet, the Admin asks me to confirm before creating it. Importing always makes a new draft. It never publishes an article or replaces existing work by itself.
The example below shows the basic shape of an import file. The complete file follows the same pattern and lists every block and image in order.
{
  "format": "blog-article-import",
  "version": 2,
  "article": {
    "title": "A prepared article",
    "slug": "a-prepared-article",
    "type": "article",
    "summary": "A short, useful summary.",
    "author": {"slug": "oli-dev0"},
    "category": {"name": "Projects", "slug": "projects"},
    "publication_sites": ["my_website"],
    "canonical_site": "my_website",
    "blocks": [
      {"type": "rich_text", "body": "<p>The opening paragraph.</p>"}
    ]
  },
  "assets": [],
  "comparisons": []
}
Images are reusable, processed, and accessible
I manage images separately so each upload keeps its own name, alternative text, caption, and processing status. A featured image represents the whole article in cards and social previews. A body image belongs to one particular part of the story.
When I upload an image, the blog checks it and creates smaller WebP versions for different screen sizes. It never stretches a small original into a larger file. Readers can open body images in a lightbox, and I can keep two matching images together for a before-and-after or theme comparison.
I also separate useful images from decoration. An image that adds information needs alternative text for people who cannot see it. A purely decorative image uses empty alternative text and cannot be added as a normal article image.
SEO and discovery come from the publishing model
I built search and sharing details into the normal publishing flow. Every public article gets a clean main URL, one clear page title, a search description, social sharing details, and structured data that describes the article in a machine-readable way.
Only published articles for the current website can appear in public search results. I include the right articles in the sitemap and RSS feed, while keeping drafts, previews, Admin pages, and internal search pages out. Category, tag, and author pages give readers useful ways to discover more without creating endless thin pages.
I also make sure the important words and links arrive in the first page response. JavaScript improves search filters, sharing, embeds, themes, and image viewing, but you do not need it to read the article.
One Blog application can serve different websites
I built the Blog once inside my shared Django project, but I can use it on more than one website. Each website still keeps its own header, layout, colours, and personality. I can publish an article on one or more supported sites and choose which one owns the main public URL.
The blog checks that categories, tags, related articles, internal links, previews, and feeds make sense for every website I select. This lets me reuse the useful parts without forcing all my websites to look the same.
What this project demonstrates
This project shows the full path from writing a draft to helping someone discover and read it. Behind the scenes, I worked on permissions, safe file uploads, image sizes, keyboard-friendly controls, search, RSS feeds, sitemaps, social sharing, and support for more than one website.
I could have used a separate headless CMS or a JavaScript page builder. Those tools can offer a more visual editor, but they would also give me another system to run and connect. I chose Django models and templates because they keep everything together and easy for me to understand. For my own publishing workflow, that is the simpler and more maintainable choice.
Frequently asked questions
Is the blog a separate CMS?
No. I built it as a Django application inside the same project as my websites. I use Django Admin as my private writing and publishing area.
Does every article need every content block?
No. I use every block in this showcase on purpose. For a normal article, I only add the blocks that make the subject easier to understand.
Does the public article depend on JavaScript?
No. I send the main content, links, forms, and navigation as part of the page itself. JavaScript only adds extras such as quicker filters, social embeds, sharing, and the image lightbox.
Can I style the blog to match my website?
Yes. The blog can use its own styling while still fitting naturally into the rest of your website.
Can different websites have different blog designs?
Yes. Each website can have its own blog stylesheet, layout, colours, spacing, and typography.
What happens if a website does not have custom blog styles?
It uses the default blog styling as a fallback, so the blog still looks consistent and usable.
Do I need to rebuild the blog for every website?
No. The blog features and content can stay shared while each website adds only the visual changes it needs.